
There are couple of options of patterns when it comes to making resting splints, but I prefer the “paddle” as I find it gives the thumb a better position and it tends to be a bit stronger.
So this is a step by step guide on how to make a resting splint. This works on children and adults alike. How you position the hand will depend on what you are trying to achieve. We will not go though the different options but will talk about splinting techniques rather than treatment options.
I will say though, that the strapping option will be as crucial as the position of the joints. In general, wider straps are safer than skinny ones.
You will need:
- Thermoplastic
- Paper towel
- Pen
- Scissors
- Electric frying pan/water bath
- Heat gun
- (Tea) towels
- Self adhesive hook Velcro
- Strapping
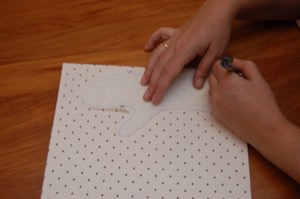
First, start off with tracing the pattern of the hand on to a paper towel or such. I like to use paper towels but you can also use plastic bags or normal paper. The reason I like to use paper towels is that they are easy accessible, strong and conforms well around the hand.

After you have drawn around the hand and forearm, add about 10mm on the side of the fingers and thumb, and about 2-3cm around the forearm, gradually increasing the added amount as you move proximally up the forearm, allowing for the bulk muscles of the forearm. So if you have a client with a larger forearm, you need to add more material. In general, you want to go up 2/3 of the forearm. If you make it too short, it will be uncomfortable. If you make it too long, you will block supination/pronation (which you may or may not want).
Once you have made the pattern, try the paper pattern on the client, to make sure it has a good fit. Adjust accordingly.
Trace the pattern onto the thermoplastic. Here we used Orfit Eco, but other thermoplastics with some memory may work just as well, e.g. Taylor splint.
If you have smaller hand, you do not need a thick thermoplastic, and for larger hands you want to go thicker. Here we used a 1.6mm thick material as it is for a child. For an adult I would use 2.0mm up to 3.0mm thickness, depending on arm size.
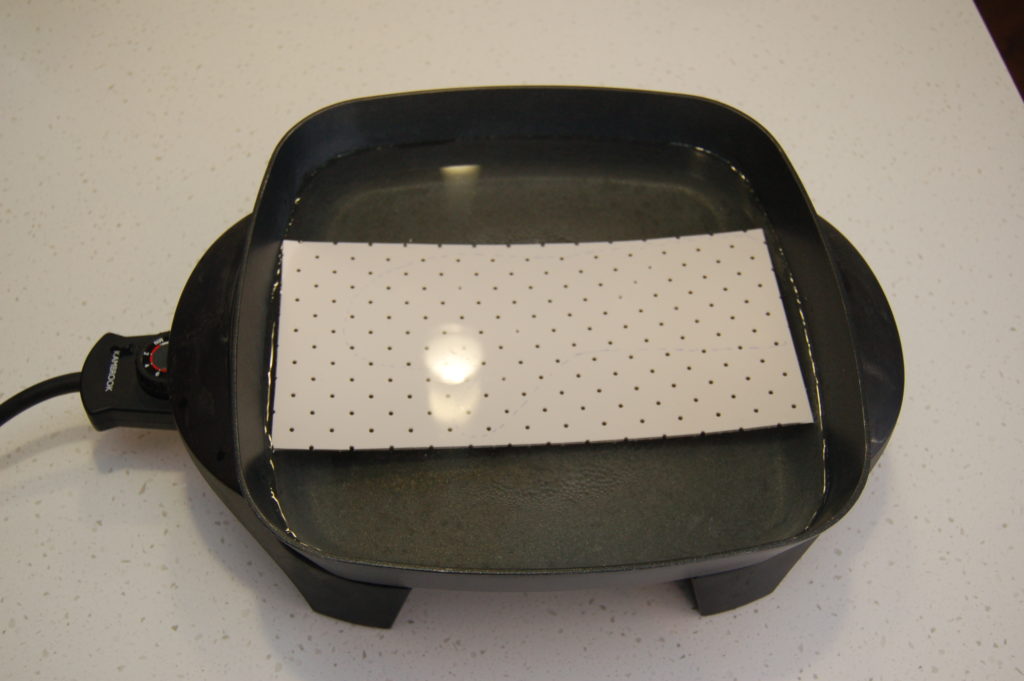
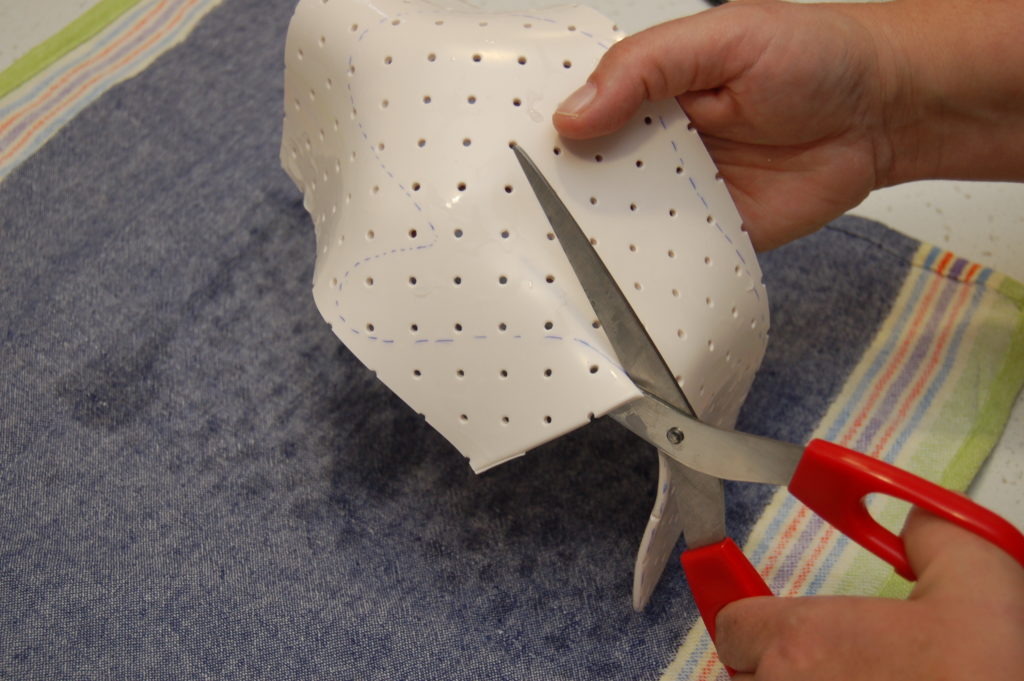
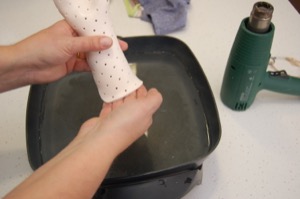
Cut down the thermoplastic small enough to fit in your water bath. Once heated and softened, cut out the splint. If you cut the thermoplastic while soft, you will have nicer, smoother edges.
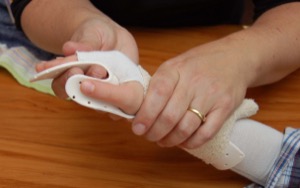
While the thermoplastic is still in the water bath, prepare the client. Place a stockinette/Tubifast stocking over arm (tight enough not to cause wrinkles on the splint). Ask the client to keep palm up (if possible) when the thermoplastic is taken out, to make it easier to place it on to the hand. Make sure the thermoplastic is not too hot before you place it on the client. Wrap the splint on using a an elastic bandage, from the wrist, up towards the elbow, but finish just before the end of the splint, not to cause the edge from digging in to the forearm.
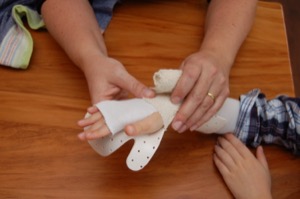
Once the elastic bandage is on, you can rotate the splint and forearm (simultaneously) to allow the splint to cool in natural position. If you leave the hand supinated, the splint will only fit well with the hand in supination!
While the thermoplastic is still soft, place the hand in the position you want it in and do not let go, especially of the wrist position, until set. At the same time, make sure to not hold your fingers still on the thermoplastic, as this will leave dents that will be uncomfortable for the client, and will be ugly! The trick is to keep one of your fingers on the dorsal aspect of the client’s wrist, while your thumb constantly is moving on the volar aspect of the splint, helping to shape the arches.
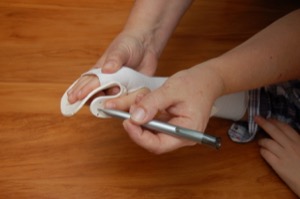
Once the splint is set, mark out any areas that need adjusting. Avoid cutting it cold, but heat it in the water bath or with the heat gun. Finish off by heating the proximal edge of the splint and flare it out. This will prevent this edge from cutting in and leaving marks.
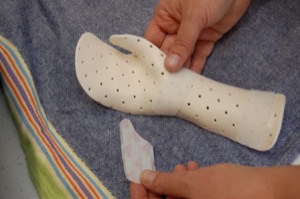
Once you are happy with the fit, attach the hook velcro. I prefer to use longer strips as this stays on better.
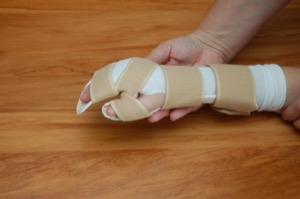
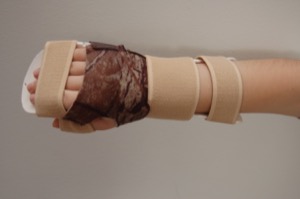
Now to the important straps. You ALWAYS want to use wide strap over the wrist for any volar splint!!!! If there is an issue with swelling, you want to cover as much surface as possible, so go wide all the way and go ELASTIC! I love using Microgrip, Fabrifoam and Durawrap/Mafra. Ensure that elastic straps are not too tight as that may compromise the circulation.
You may want to provide the client with a loose fitting stockinette to wear under the splint for comfort and to protect the skin.
Any resting splint needs to be monitored by a qualified therapist.